
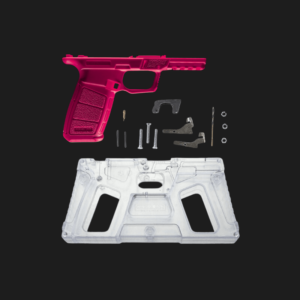
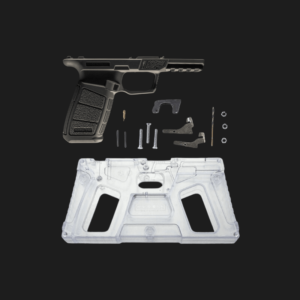

So, you purchased everything you need to build your own Polymer 80 Single Stack (Glock 43 or PF9SS) and you’re ready to install your lower parts kit.
Husky Armory has you covered with our expert tested lower parts kit installation instructions & How To.
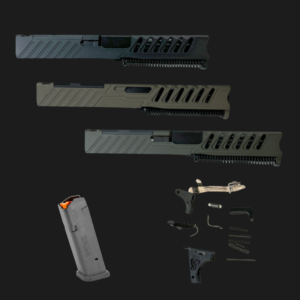
Lower Parts List – P80 Single Stack (G43 or PF9SS)
- Trigger
- Trigger Bar
- Trigger Housing
- Trigger Spring
- Trigger Connector
- Trigger Pin
- Trigger Housing Pin
- Slide Lock
- Slide Lock Spring
- Magazine Catch
- Magazine Spring
- Slide Stop Lever – Release
- Rear Rails (P80 Single Stack)
- Locking Block (P80 Single Stack)
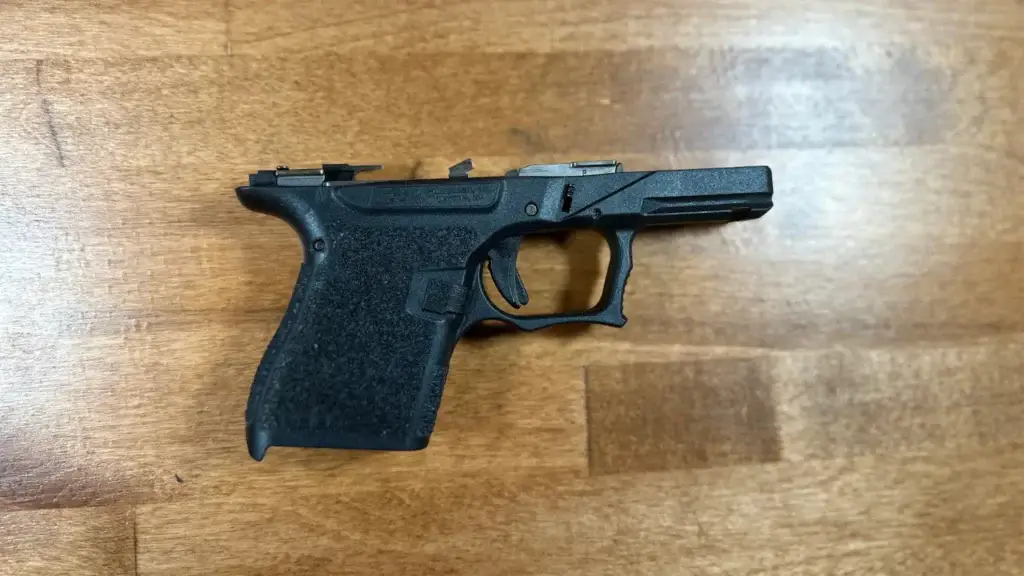
How to Install the Lower Parts Kit Instructions
P80 Single Stack (G43 or PF9SS)
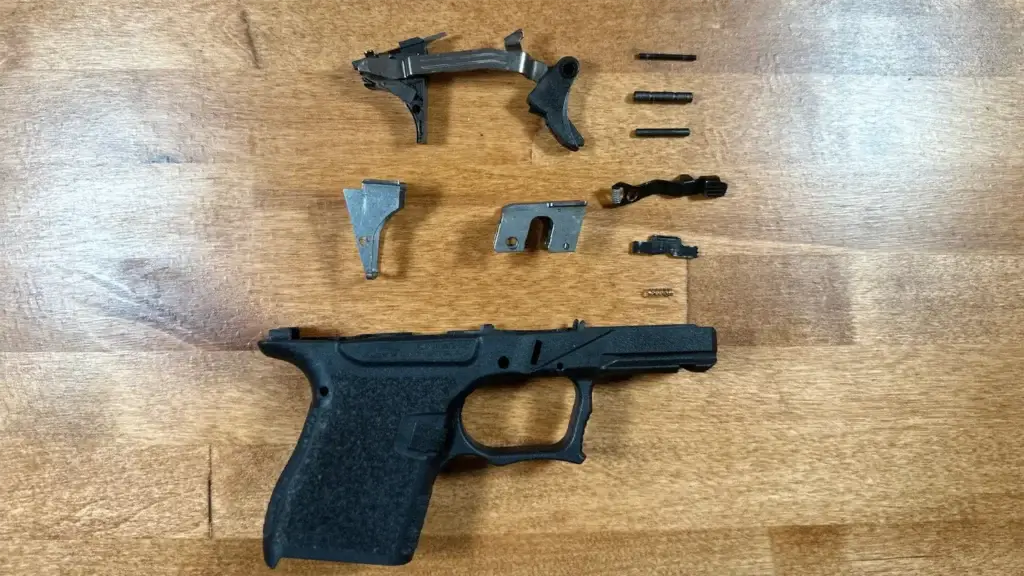
Before you get started, remember, many of these parts are tiny and easy to lose! Be sure you have a clean and neat surface with everything laid out to make your LPK install process a breeze.
Step 1 – Install Slide Lock Spring
Find the small coiled spring and carefully “drop” it into the hole near the center of your P80 Single Stack or G43 frame.
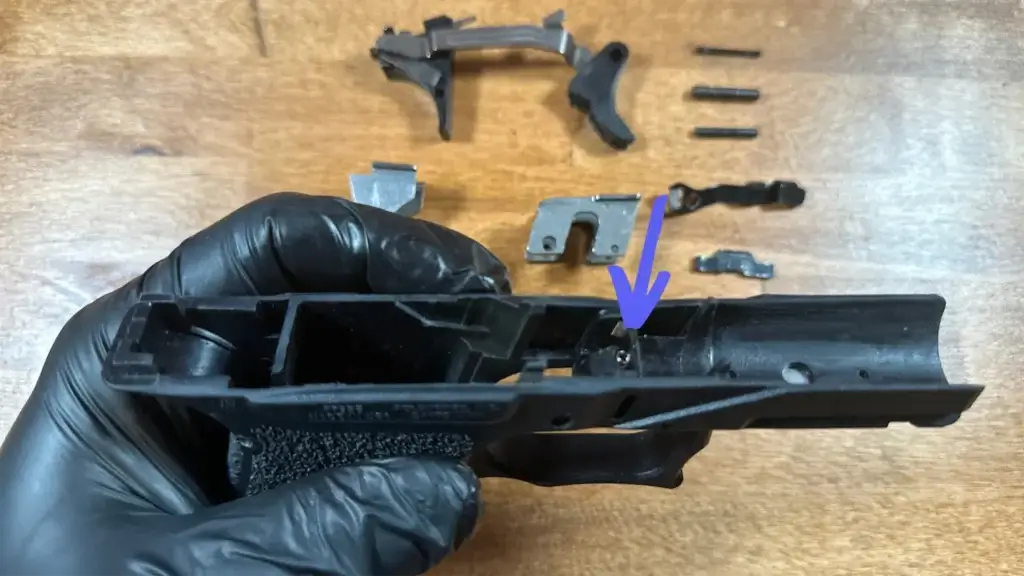
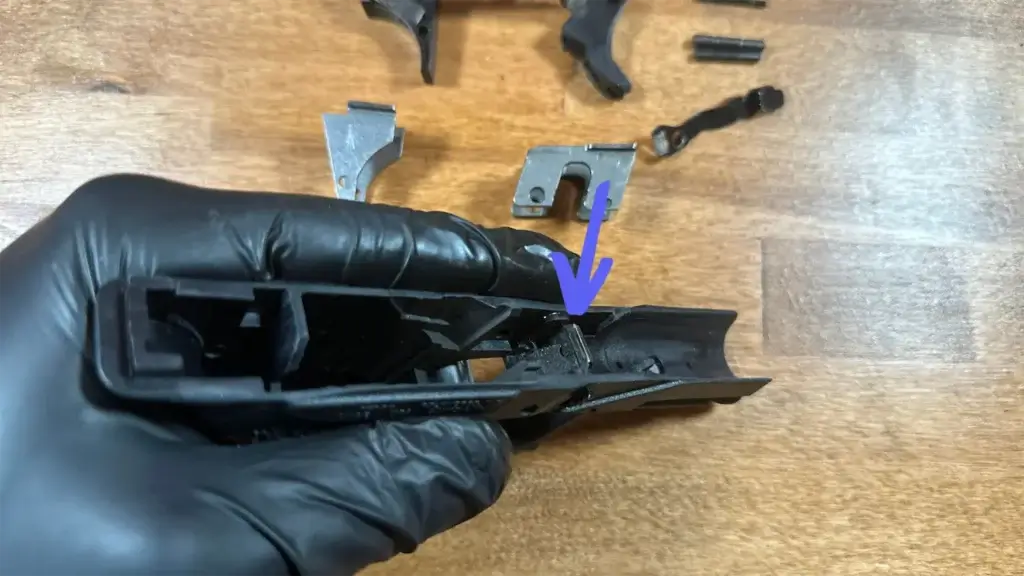
Step 2 – Install Slide Lock
With the leading edge angled up, push the slide lock over your G43 slide lock spring and apply downward pressure.
The slide lock should now push through to the other end of the frame and lock (be pushed) up by the force of the spring.
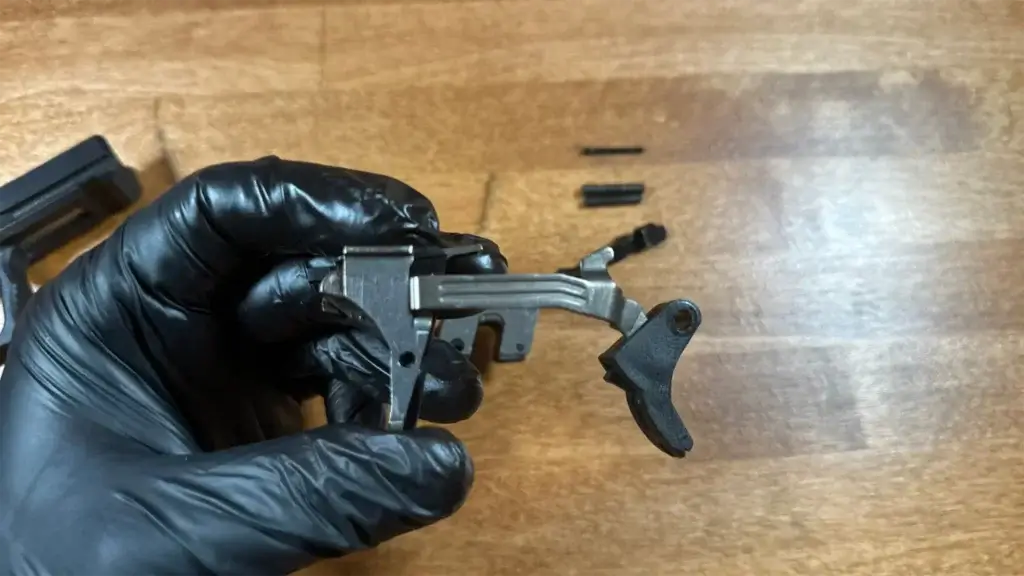
Step 3 – Install Rear Rail + Trigger Assembly
The trick to seating the entire trigger assembly into the frame is to slide the rear rail onto the trigger housing before seating into your single stack frame. After the rear rail is pushed onto the housing it will be held by friction.
First push the trigger through the “trigger slot of your frame and then you will be able to push the rear rail + trigger housing into the back of your frame.
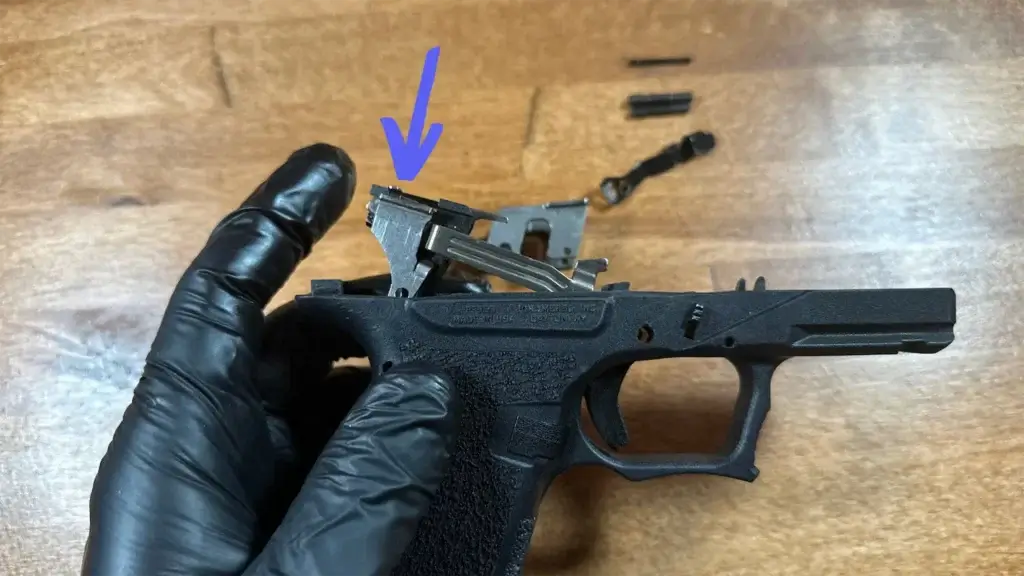
Note: This may take some wiggling but it should all seat flush
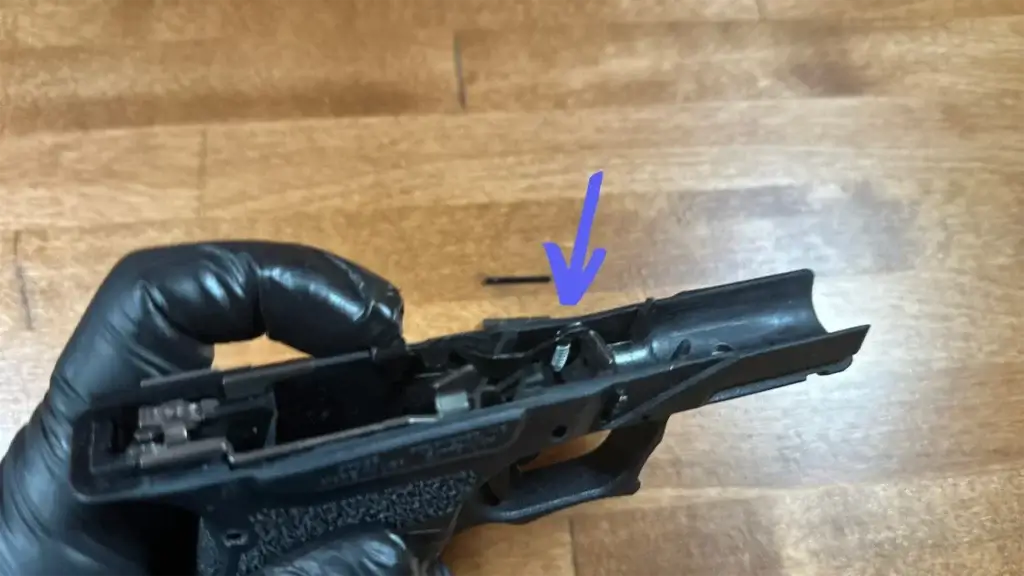
Step 4 – Install Slide Stop Lever – Release
Installing the slide stop lever on the P80 Single Stack is simple compared to the larger P80/Glock models. It is all on one piece so there is nothing to guess or align.
The spring end of the slide stop will have a cut-out / seat in the frame that you drop it into and then lower the back of the slide stop so it holds over the edge of the frame.
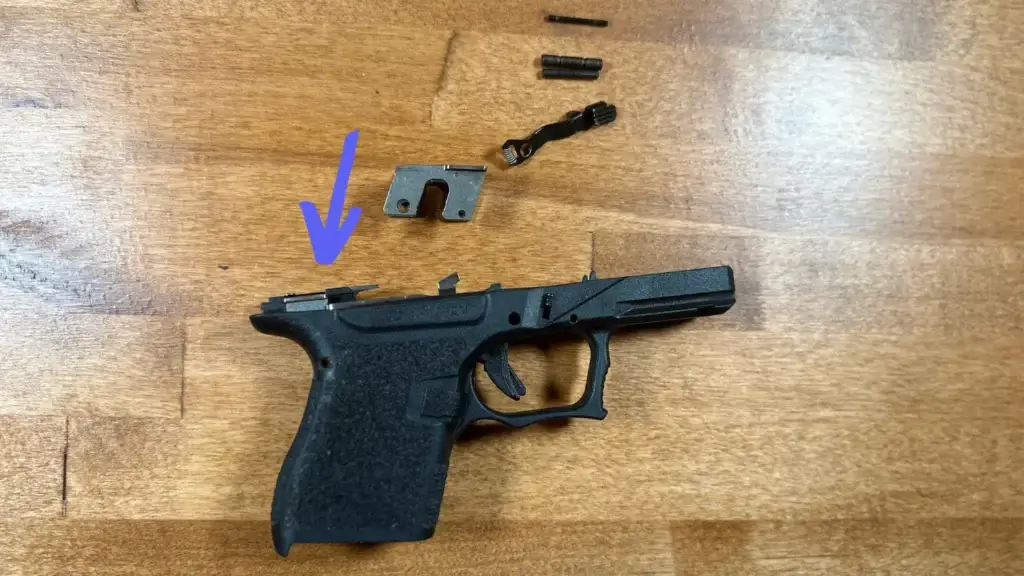
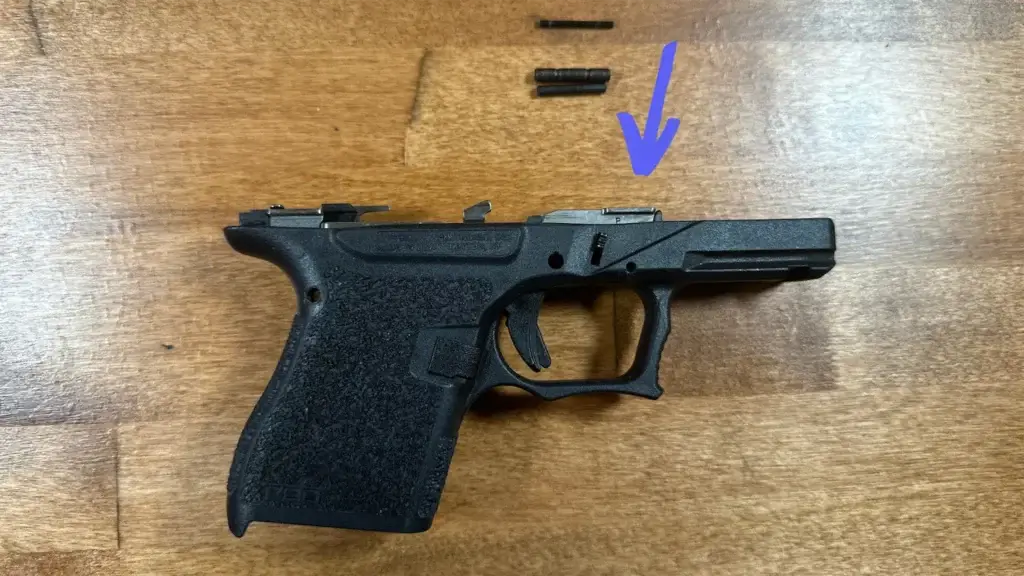
Step 5 – Install Locking Block
Now pick up your locking block making sure its oriented correctly with the rails facing forward.
Once it feels correct, push down firmly and it should go in snug, but with relative ease.
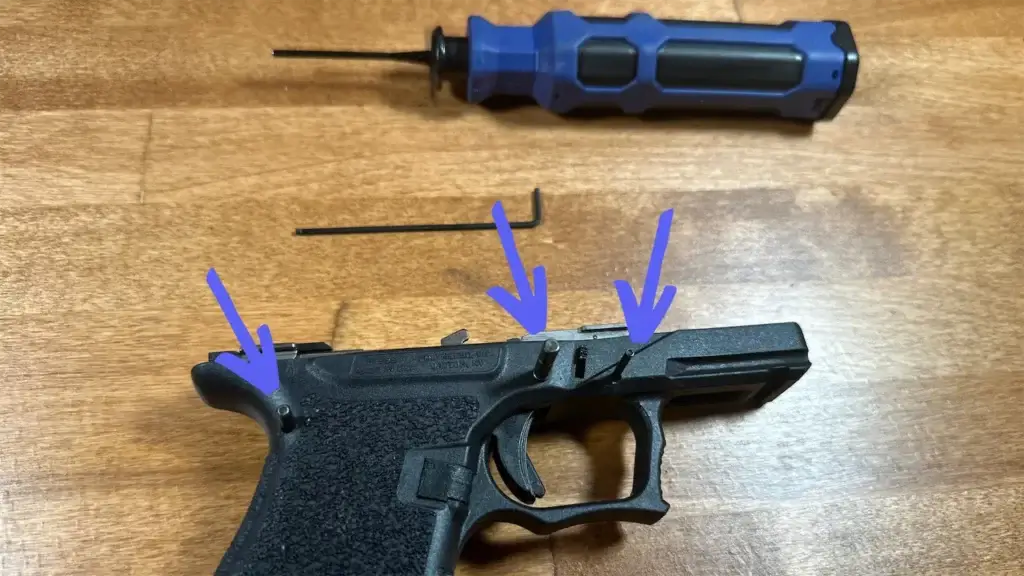
Step 6 – Install Trigger Housing, Trigger, and Locking Block Pins
Their are 3 pins for the P80 Single Stack / Glock 43 including a large(trigger pin), medium (trigger housing pin), and small (locking block pin).
With your fingers, push each one into their respective holes so they are about half way through the frame.
Now use a Glock tool, punch set, or Allan key to seat them through to the other side.
Note: You may need to apply some downward force on the trigger and/or play with the fitment of the slide stop release for the pins to clear through both sides
That’s it, your P80 Single Stack or Glock 43 lower parts kit is now 100% complete!
Step 7 – Install Slide Kit
Add oil to the rails, slide grooves and barrel where needed and push your slide onto your Single Stack frame.
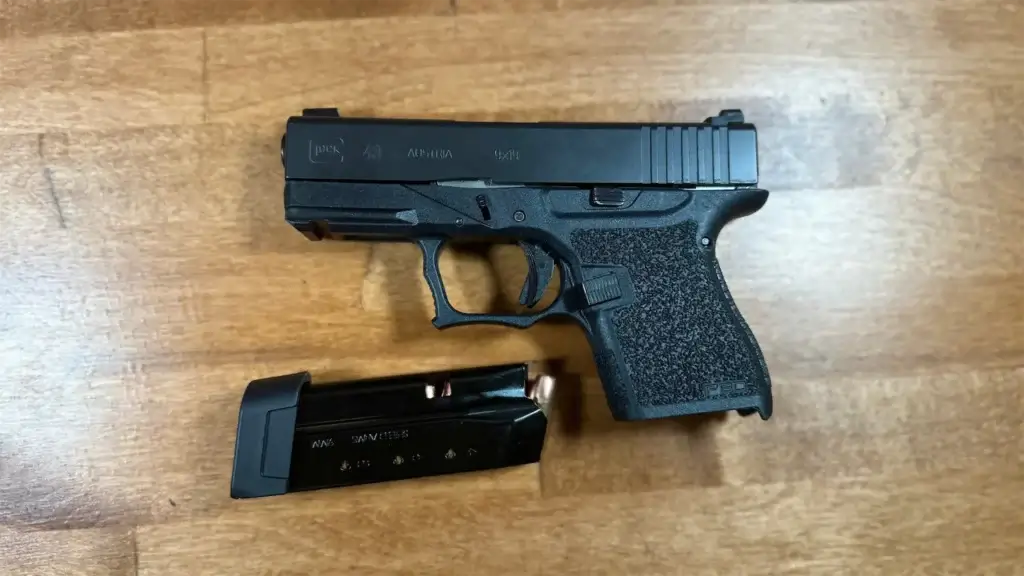
Now you are ready to break in your new Polymer 80 or Glock by sending some high grain 9mm ammo down range!
