

So you were looking for something other than the Polymer 80 for your 80% Glock build and you decided to buy a Geisler Defence 19x.
While building your own Glock style firearm may seem intimidating, installing the lower parts kit is a relatively simple process that can be completed with just a few tools and a little bit of know-how.
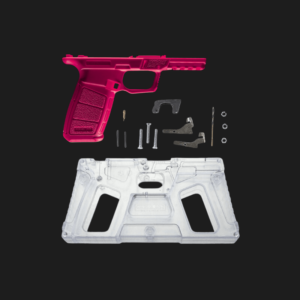
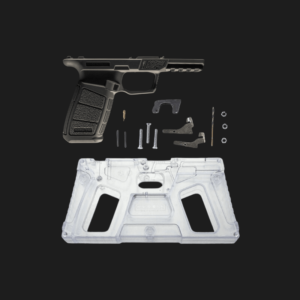
The only thing needed is a Glock 19/17 or P80 Compact/Full Size lower parts kit.
In this step-by-step guide, we’ll walk you through the process of installing the Geisler Defence 19x Lower Parts Kit, from start to finish.
Husky Armory has you covered with our expert tested lower parts kit installation instructions & How To.

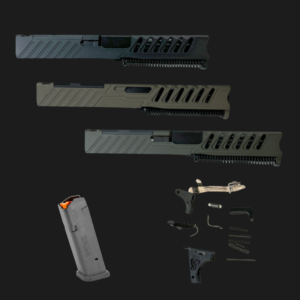
Lower Parts List – Geisler Defence (G19x)
- Trigger
- Trigger Bar
- Trigger Housing
- Trigger Spring
- Trigger Connector
- Trigger Pin
- Trigger Housing Pin
- Slide Lock
- Slide Lock Spring
- Magazine Catch
- Magazine Spring
- Slide Stop Lever – Release
- Rear Rails
- Locking Block
Geisler Defence 19x Lower Assembly How To Video
How to Install the Lower Parts Kit Instructions
Geisler Defence (G19x)
Before you get started, remember, many of these parts are tiny and easy to lose! Be sure you have a clean and neat surface with everything laid out to make your LPK install process a breeze.
Step 1 – Install Magazine Spring
You can use your fingers if they are smaller or needle nose pliers and push the magazine spring into the frame and seated within the hole.
Be sure to push the spring all the way down until it is flush within your GD 19x frame.
Step 2 – Install Magazine Catch
Push the magazine catch through the right side of the frame (bigger hole) and using a screw driver or pliers push the spring towards the back of the frame.
Once there is tension on the spring the catch should push all the way in to the other side.
Now push the spring inwards and to the right until it locks into the magazine catch. The magazine catch button should now work and you will feel the pressure of the spring.

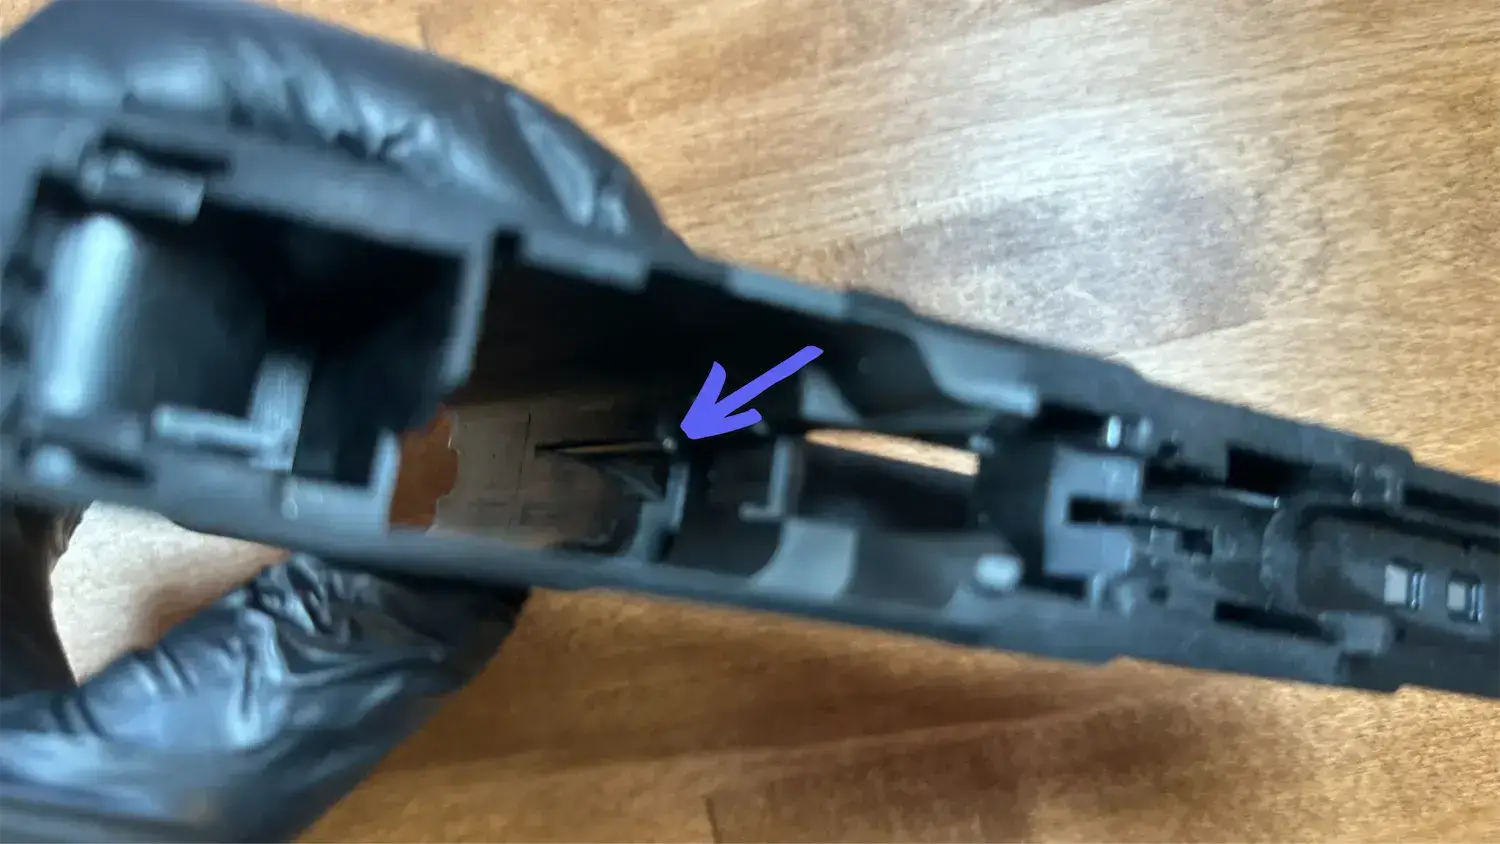
Step 3 – Install Slide Lock Spring
Find the compact sized slide lock spring and push the smaller end into your Geisler 19x frames slot in the locking block area.

Step 4 – Install Slide Lock
With the leading edge angled up, push the slide lock over your Geisler Defence slide lock spring and apply downward pressure.
The slide lock should now push through to the other end of the frame and lock (be pushed) up by the force of the spring.

Step 3 – Install Trigger Assembly
Slide the edge of the trigger bar in the the slot that is line up along the top of the trigger housing.
You will push down and then up. You will then hear the assembly click into place.

First push the trigger through the “trigger slot of your frame and then you will be able to push the rear rail rails into their slots followed by the trigger housing into the back of your frame.

Note: This may take some wiggling but it should all seat flush

Step 4 – Install Slide Stop Lever – Release
Installing the slide stop lever on the Geisler Defence 19x is fairly straightforward.
The front of the slide stop lever has a whole and thin wire spring that should be around the trigger pin opening.
Later the trigger pin will apply the downward pressure on the slide stop lever to allow the 19x lever to function.

Step 5 – Install Locking Block
Now pick up your locking block making sure its oriented correctly with the rails facing forward.
Once it feels correct, push down firmly and it should go in snug, but with relative ease.

Step 6 – Install Trigger Housing, Trigger, and Locking Block Pins
Their are 4 pins for the GD 80% 19x including a large(trigger pin), medium (locking block), and 2 small (front locking block and trigger housing pins).
With your fingers, push each one into their respective holes so they are about half way through the frame.
Now use a Glock tool, punch set, or Allan key to seat them through to the other side.
Note: You may need to apply some downward force on the trigger and/or play with the fitment of the slide stop release for the pins to clear through both sides

That’s it, your Geisler Defence 19x lower parts kit is now installed and ready to go!
Step 7 – Install Slide Kit
Add oil to the rails, slide grooves and 19x barrel where needed and push your slide onto your Single Stack frame.

You are now ready to go and shoot your Geisler Defence 19x build kit!
